
Today I’m going to show how to setup a software RAID for Windows Server 2003. Yes, Windows Server 2003 has a built-in function that almost similar to Software RAID function.
Please make sure before this installation, you will need 2 identical hard disk with same space connected to the server. But the truth is, you don’t need to same hard disk with the same space amount, but as long as you partitioned the space equally then it would be good as well. But for beginner, it is better to get a hard disk that got the same space quantity, less percentage that you would get yourself confused.
Below are the steps on how to enable the Software RAID inside Windows Server 2003:
1) Install the Windows server 2003
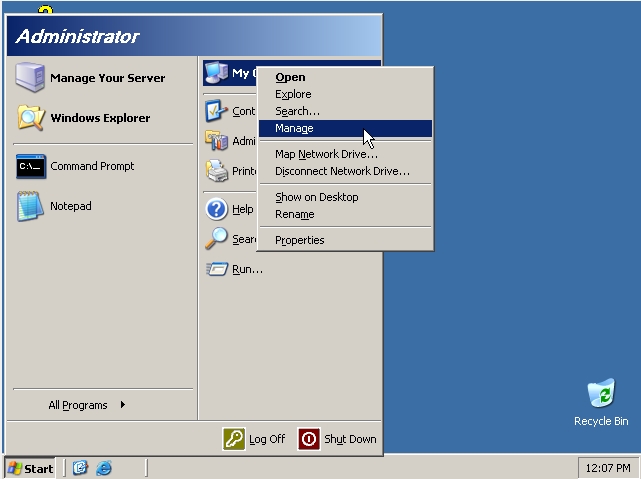
2) After the installation has finished, click on Start button and right-click on My Computer. Select Manage and click on it:
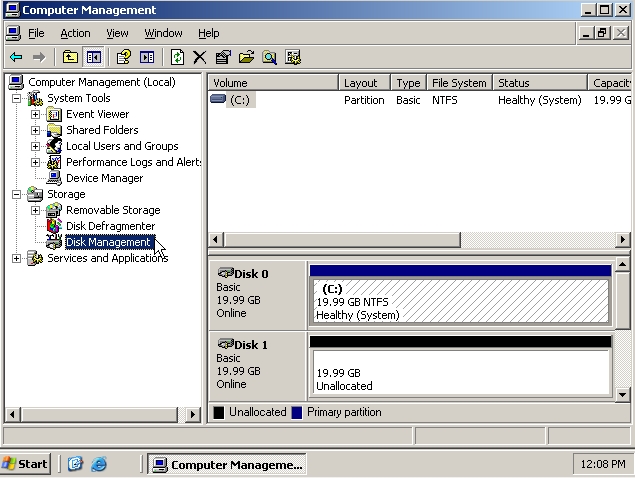
3) Next is to select Disk Management:
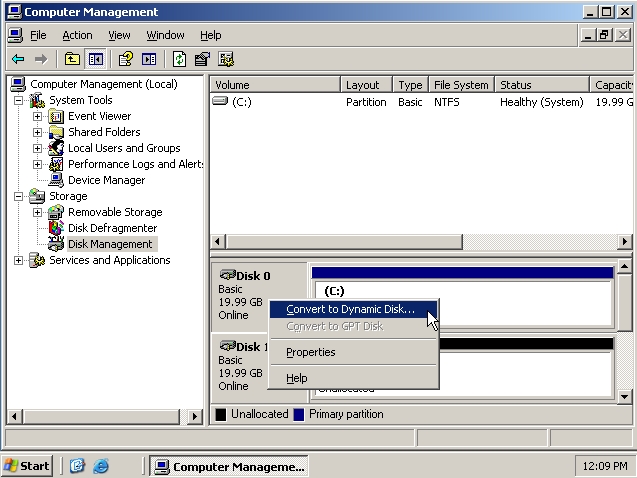
4) Right-click on your current hard disk that contained the Windows and select Convert To Dynamic Disk:
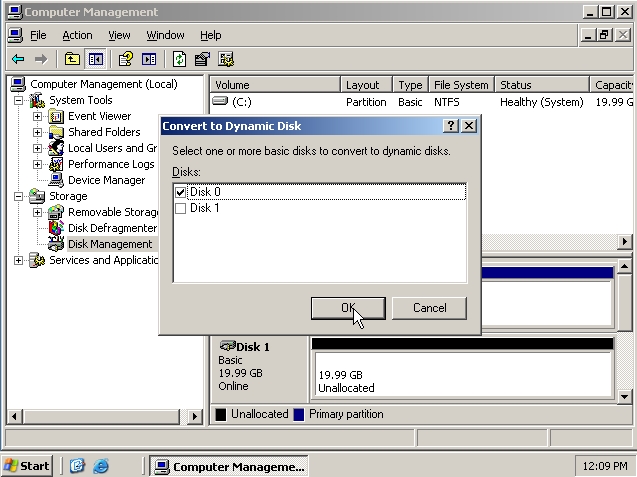
5) Select the hard disk that you want to convert. Make sure to select the 2nd hard disk you want to add as RAID as well to convert to Dynamic Disk and click the Ok button:
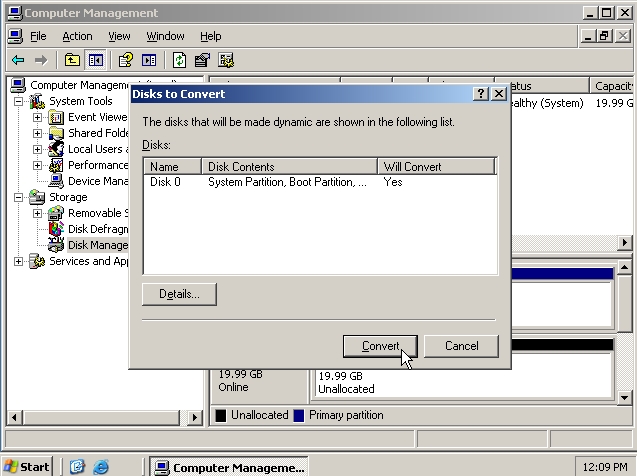
6) Click Convert button to proceed:
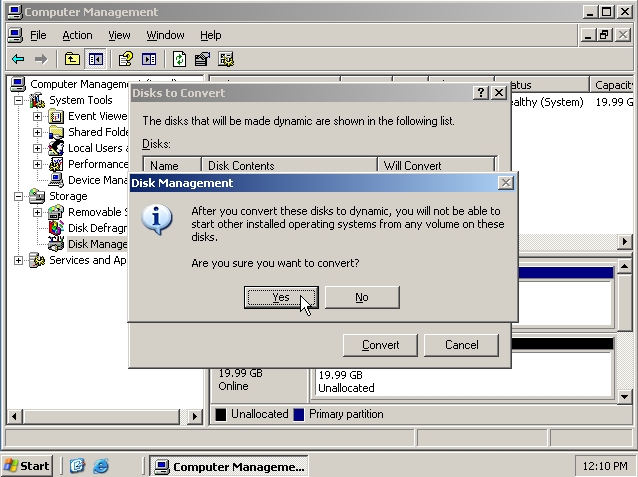
7) Please be advised that you can’t convert the hard disks back once to normal once you have converted to dynamic. Click the Yes button to proceed:
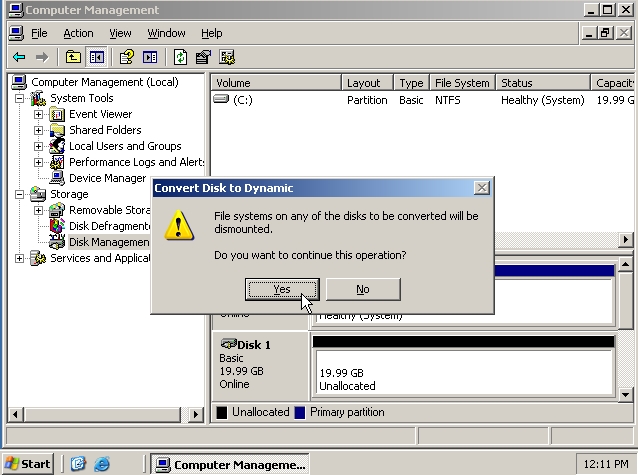
8) Click Yes again to proceed:
9) After the conversion has been done, the system will go for a reboot.
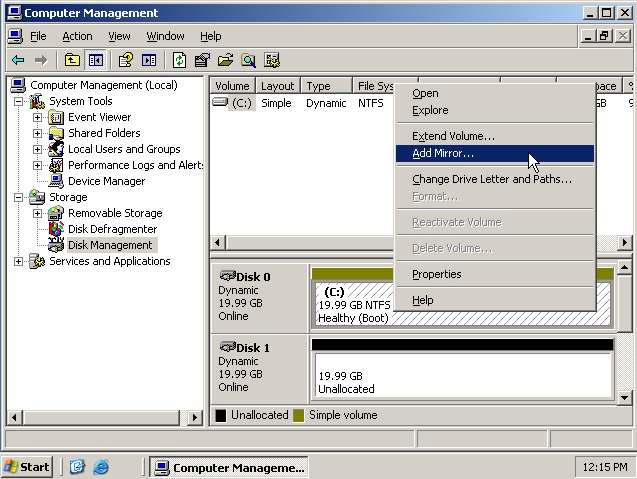
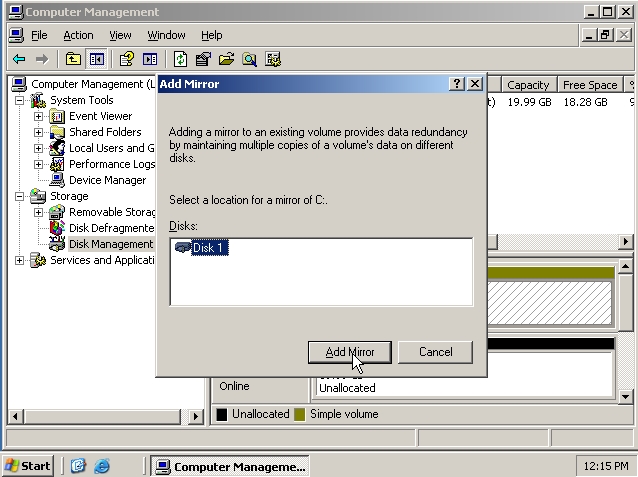
10) Once the reboot done, open back the Computer Management and this time you can see both hard disks are labeled as Dynamic. Right click on the Disk 0 (which contains the operating system) and select Add Mirror (which is similar to RAID1, whereas the Extend Volume option is similar to RAID0) :
11) Now select the 2nd hard disk that you want to add as its mirror (RAID1) and click the button Add:
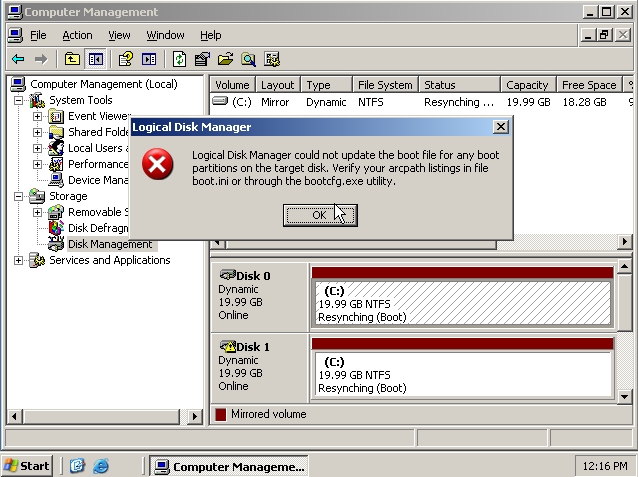
12) Now the system will start synchronizing. Don’t worry about the error message appeared since it is only mentioning that the boot file has been copied. Just wait for a while till it finished:
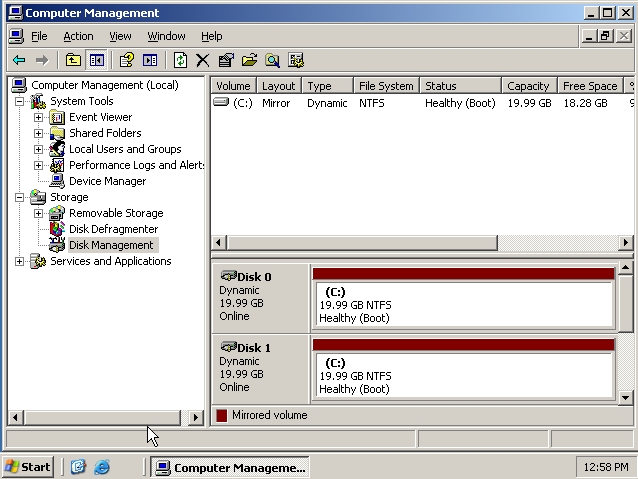
13) Once the synchronization has been done, this will be the final outlook of your hard disks appearance:
That is all on how to setup Software RAID on Windows Server 2003.
No comments:
Post a Comment