
The ability to record and run macros has been a wonderful feature in Word and continues to be in the latest versions of Word.
Macros are recorded commands and keystrokes that allow us to save great amounts of time instead of doing the same thing over and over again. Macros allow us to do those same things automatically and it is even easier to do create and run them in Word 2010!
As I said above, macros allow us to do something automatically that we normally would have had to use keystrokes or mouse actions to accomplish.
Suppose you find yourself having to change the font style and and the formatting of it in certain documents, or even in a couple of places in one document? To do this without a macro, you would have to select your text, click on Current Font and select Times New Roman or some other font, click on the Current Font size and select 12, and then say you would have to bold and underline the text as well. That could take up valuable time couldn’t it?
A lost of folks are afraid of macros and so they never learn how to create and run them and so they waste a lot of time.
Once I show you how quickly and easily you can accomplish a task using a macro I am sure you will be finding all manner of uses for them.
Follow the steps below to create a macro to take care of all the above steps for you:
- Highlight the text you whose font you would like to change.
- Click on the View tab of your Ribbon.
- In the Macros group, click the small arrow under the Macros icon which will dislay a drop-down menu.

- Click Record Macro.
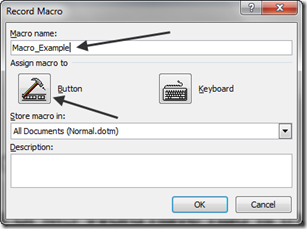
- Key in a name for your macro, but if you are using more than one word you must use an underscore between the two words or it will not work.
- Click on the Button icon shown above, which will display Word Options.
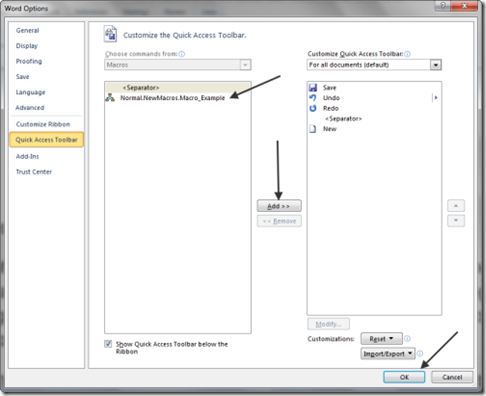
- Click on the new macro name listed on the left side of your screen (under Separator), to select it.
- Click the Add button to add your macro to your QAT (Quick Access Toolbar).
- Click OK.
The macro setup window will close and you will be taken back to your document and your cursor will be turned into what looks like an old fashioned tape cassette, which is the indicator that your macro is now recording.
Now we will record the key strokes, etc.
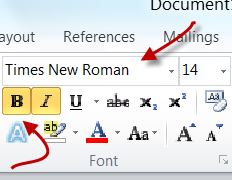
- Click on the Current Font area and select Times New Roman.
- Click on the Font Size and select 14.
- Click on the Bold and Italics icons.
- Those are all the steps you need to record, so to stop recording, click on the View tab or your Ribbon again and click onMacros | Stop recording.

Your macro should now be ready to use!
To test your macro:
- Select some text in your document.
- Take a look at your QAT and you should see a new Macro icon.
- Click the icon and your macro should run and perform all of the formatting tasks that you assigned to it.
There are lots of other options and methods to record macros as well.
No comments:
Post a Comment